 IdealPoint Of Sale
Support
HiStone HK528: the built-in receipt printer on Windows
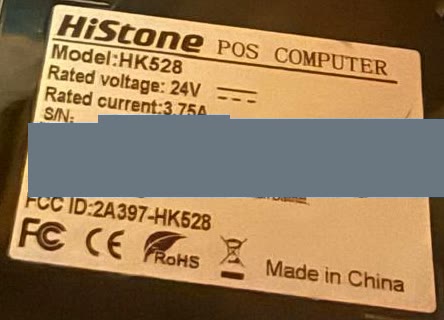
The HiStone HK528 all-in-one has an 80 mm receipt printer built in, a HiStone PM362 on the unit's internal USB. HiStone publishes no Windows driver for it, and IdealPOS needs none: IdealPOS sends the printer its own commands (ESC/POS) through a plain Windows printer. A script sets that printer up in about a minute.
You need:
- the HK528 running Windows 10 or 11, with IdealPOS installed;
- a Windows sign-in that can approve administrator rights;
- paper in the printer and its cover closed.
The setup scripts
One zip with two files: RUN_ME_Setup_HiStone_Printer.bat, the one you run, and Setup-HiStoneReceiptPrinter.ps1, the script it starts.
-
1Extract the zip on the HK528
Download the zip on the HK528, or copy it over. Right-click it and choose Extract All…, then use the extracted folder: the script does not run from inside the zip.
-
2Run the setup
Double-click
RUN_ME_Setup_HiStone_Printer.batand answer Yes when Windows asks for administrator rights. If Windows first warns about a file from the internet, choose Run (or More info → Run anyway).In a window that stays open, the script:
- finds the printer by its USB ID (
2AAF:2010); - restarts the printer's USB device when Windows made no USB port for it. Both units set up so far needed this, so the yellow lines are normal;
- adds the Generic / Text Only printer on that port (
USB001) as ReceiptUSB; - prints a test slip, cut at the end.
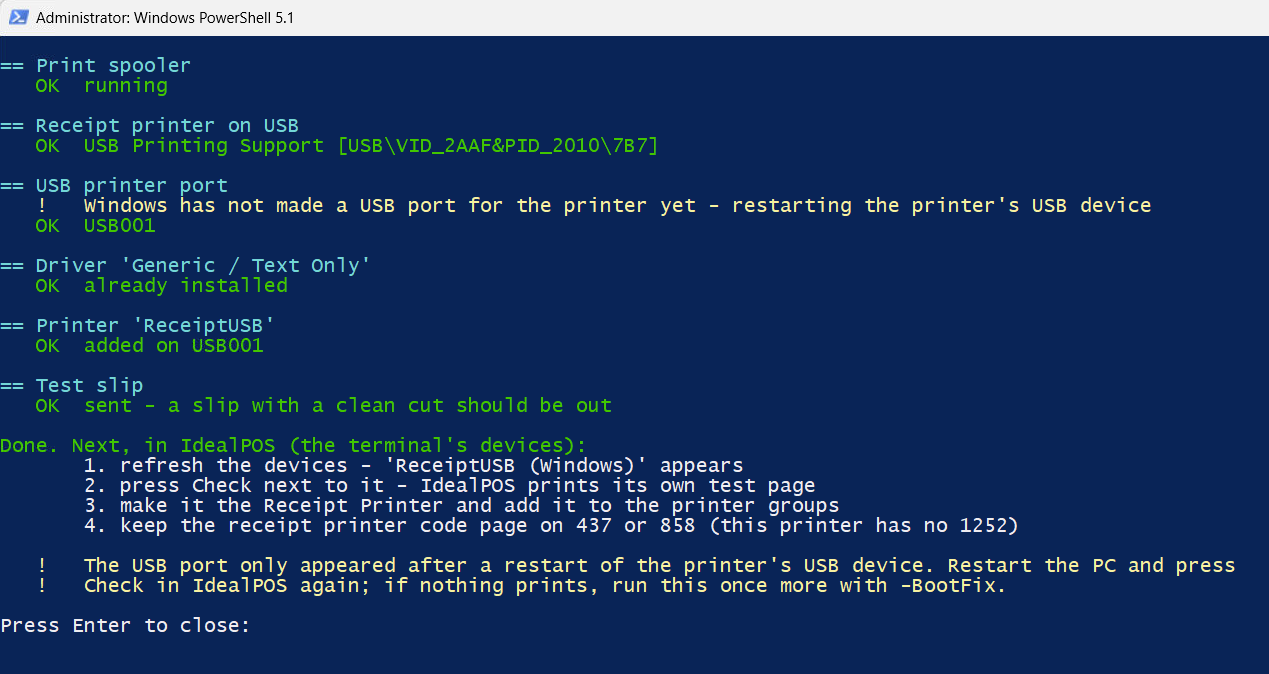
A full run. Press Enter to close the window. - finds the printer by its USB ID (
-
3Check ReceiptUSB in IdealPOS
In IdealPOS on the HK528, open Terminal Settings → Peripherals (Printer, Cash Drawer, …). In the POS Terminal #… Devices window, click the receipt printer box. The device list opens: press the green refresh arrows so ReceiptUSB (Windows) appears, then press Check next to it.
IdealPOS prints its own test page, which ends with a QR code.
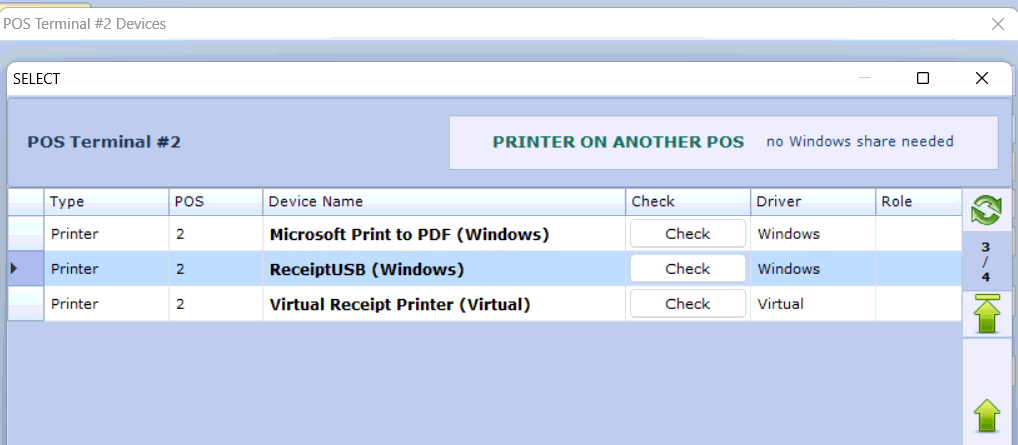
The device list: ReceiptUSB (Windows) with its Check button; refresh is at the top right. 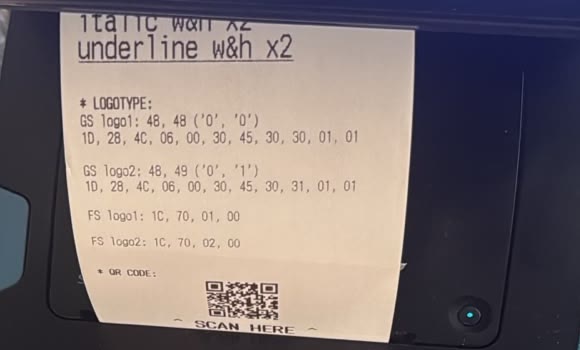
IdealPOS's test page on the HK528. -
4Make it the receipt printer
Choose ReceiptUSB (Windows) in the list so it becomes this POS's receipt printer, and add it to the printer groups that should print on it.
Keep the receipt printer code page on 437 or 858 (Support Settings → Devices). The PM362 has no code page 1252, so with 1252 the € sign and accented letters come out wrong; 858 has the € sign, 437 does not. It is one setting for the whole site, so after changing it check that the site's other receipt printers still print correctly.
-
5Restart the HK528 once
Restart the PC and press Check next to ReceiptUSB again. If it prints, you are done. If nothing comes out after the restart, see the first point below.
If something goes wrong
- Nothing prints after the PC restarts. Windows lost the printer's USB port again. Run the setup once more with
-BootFix: open the extracted folder, typecmdin its address bar and press Enter, then runRUN_ME_Setup_HiStone_Printer.bat -BootFix. It adds a startup task, IdealPOS - restart receipt printer USB, that restarts the printer's USB device 15 seconds after every start of Windows. To remove it later, delete that task in Task Scheduler. - ReceiptUSB has disappeared: keep Windows protected print mode off. Protected print mode allows only printers that need no old-style driver. Generic / Text Only is such a driver, and the PM362 has no driverless USB mode (IPP over USB), so with protected print mode on, ReceiptUSB is removed. In Settings → Bluetooth & devices → Printers & scanners, ReceiptUSB has no shield. Keep the mode off on the HK528, and run the setup again if ReceiptUSB is gone.
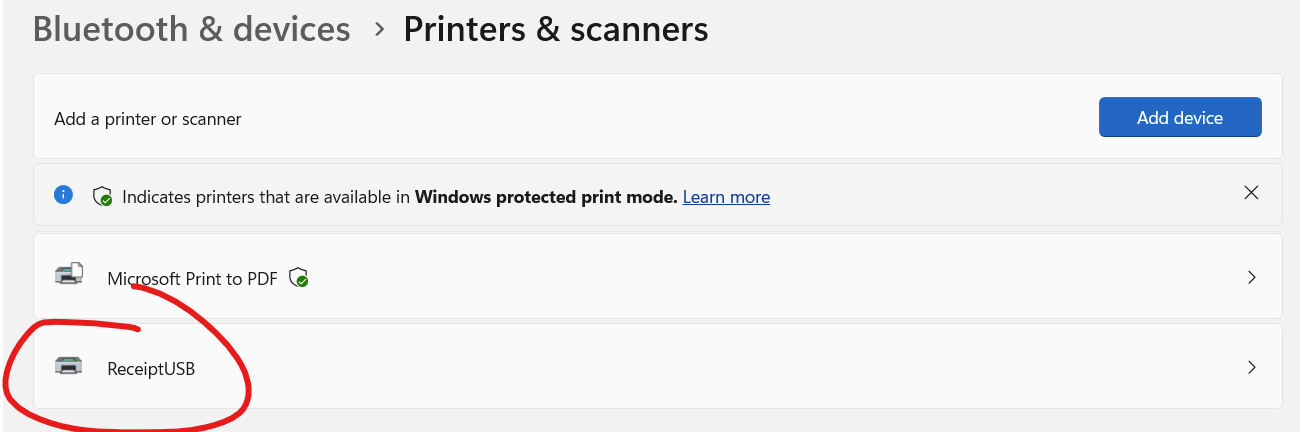
ReceiptUSB has no shield: it would not survive protected print mode. - Accented item names print as Chinese characters. The printer is in Simplified Chinese mode (its self-test slip says Simplified Chinese Mode: YES), so it reads accented letters as Chinese. Turning that off needs HiStone's own setup tool; until then keep item names without accents.
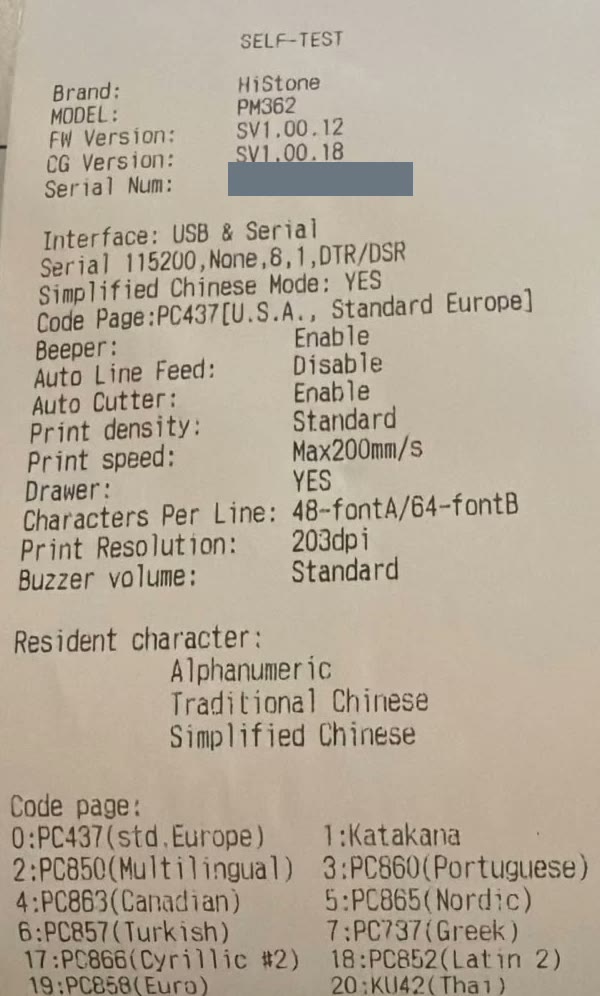
The printer's self-test slip: Simplified Chinese mode on; code pages 437 (0) and 858 (19), no 1252 (serial number covered). - “No USB printer found.” The printer is off or not connected inside the unit. Device Manager should list USB Printing Support under Universal Serial Bus controllers; if it does not, the unit needs HiStone's attention.
- “Windows made no USB printer port for the printer.” Restart the PC and run the setup again.
- “Several USB printers are connected.” The script lists them. Run it again from
cmdwith the right one, for exampleRUN_ME_Setup_HiStone_Printer.bat -HardwareId "USB\VID_2AAF&PID_2010"(the ID without the part after the last\). - “job … is still waiting”. Check the paper and the cover, then run the setup again.
- What to send IdealPOS support. A photo or screenshot of the whole script window, and what this shows in PowerShell run as administrator:
Get-PnpDevice -PresentOnly | Where-Object Service -eq usbprint | Format-List FriendlyName, InstanceId, Status; Get-PrinterPort | Where-Object Name -like 'USB*' | Format-Table Name, Description; Get-Printer | Format-Table Name, DriverName, PortName
Without the script: the commands by hand
For when the script cannot run. In PowerShell, run as administrator:
# 1. the printer: note its InstanceId (USB\VID_2AAF&PID_2010\...)
Get-PnpDevice -PresentOnly | Where-Object InstanceId -like 'USB\VID_2AAF&PID_2010*' | Format-List FriendlyName, InstanceId, Status

# 2. its USB port: is there a USB001?
Get-PrinterPort | Where-Object Name -like 'USB*'

# 3. no USB port: restart the printer's USB device (your InstanceId), then run step 2 again
pnputil /restart-device "USB\VID_2AAF&PID_2010\966"

# 4. the printer on that port
Add-PrinterDriver -Name "Generic / Text Only"
Add-Printer -Name "ReceiptUSB" -DriverName "Generic / Text Only" -PortName "USB001"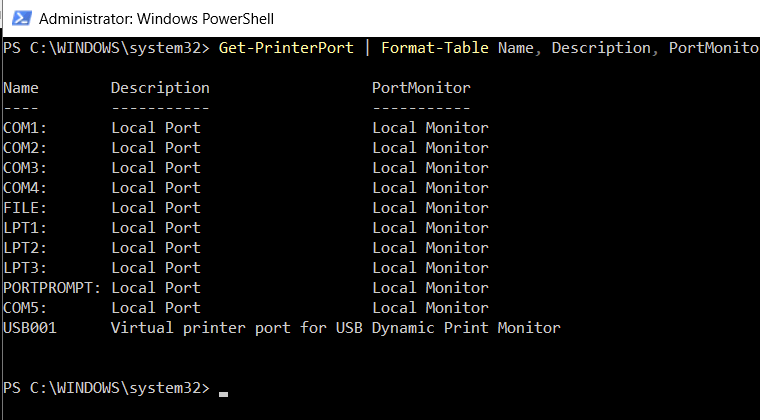
Then carry on from step 3.